Developers
Integrate mobile payments and monetize with Mocopay
Our developer center provides all the details for a simple and smooth integration so you could easily add mobile payments with Mocopay.
Using control box
Control box is GUI which enables you to configure and use MoCoPay payments instantly, for free and without any direct contact with MoCoPay team. Using it you can administrate your personal details, payment services, search particular transactions and keep track of your earnings. In following text we will explain usage of control box in more details.
Creating your MoCoPay account
To have a privilege to use our control box, you need to create account by signing in through www.mocopay.com and filling all necessary data (see scheenshot below).
After clicking on JOIN NOW button, you will receive email on provided email address. In this email you will find confirmation URL which you need to open to get your account fully activated. After finishing that step, all you need to dio is to Log-in into our control box by filling in necessary data into provided form presented in screenshot below.
Control box Homescreen
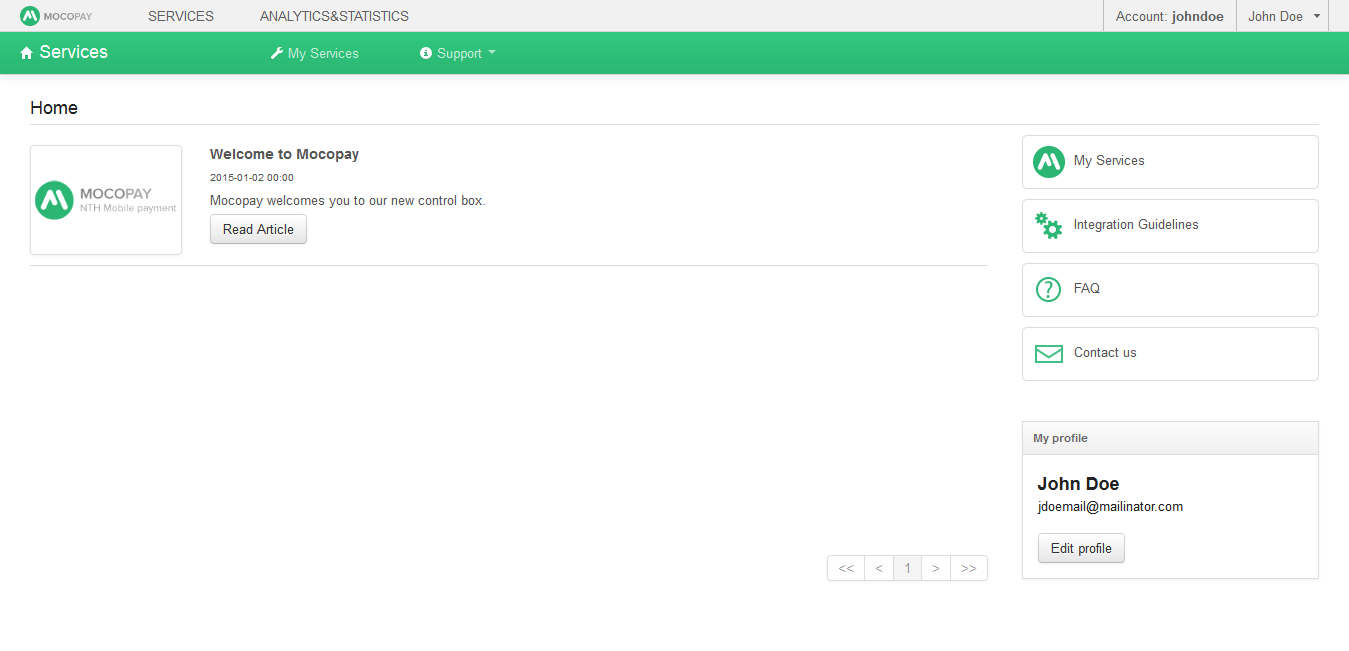
When entering the control box, you will be welcomed by its homescreen page. On it you can find news section on which we will publish all important notifications and news, it is highly recommended to read all news when you log in.
Also from homescreen you have access on all control box subsections, pages and options:
- My Services – control box subsection which offers you to manage your MoCoPay payment services.
- Analytics&Statistics – subsection which offers you an overview of your earnings in different distributions through attractive graphs, tables, trend indicators. This subsection also gives you an option to find particular transaction or transactions for your users.
- Integration Guidelines – menu entry which will open you development integration guidelines written on http://www.mocopay.com/developers
- FAQ – menu entry which will guide you to the frequently asked questions also available on http://www.mocopay.com
- Contact us – menu entry which you can use to contact our support when you have any questions or problems with your MoCoPay services.
- My Profile – gives you access to your profile page, with all personal and payment data. It is highly recommended that you keep your profile filled with updated and accurate information.
- Payout specification – menu entry which guides you to your payout specification file, in it you can find all payout percentage specification by each country which MoCoPay offers payment for.
Creating your payment service
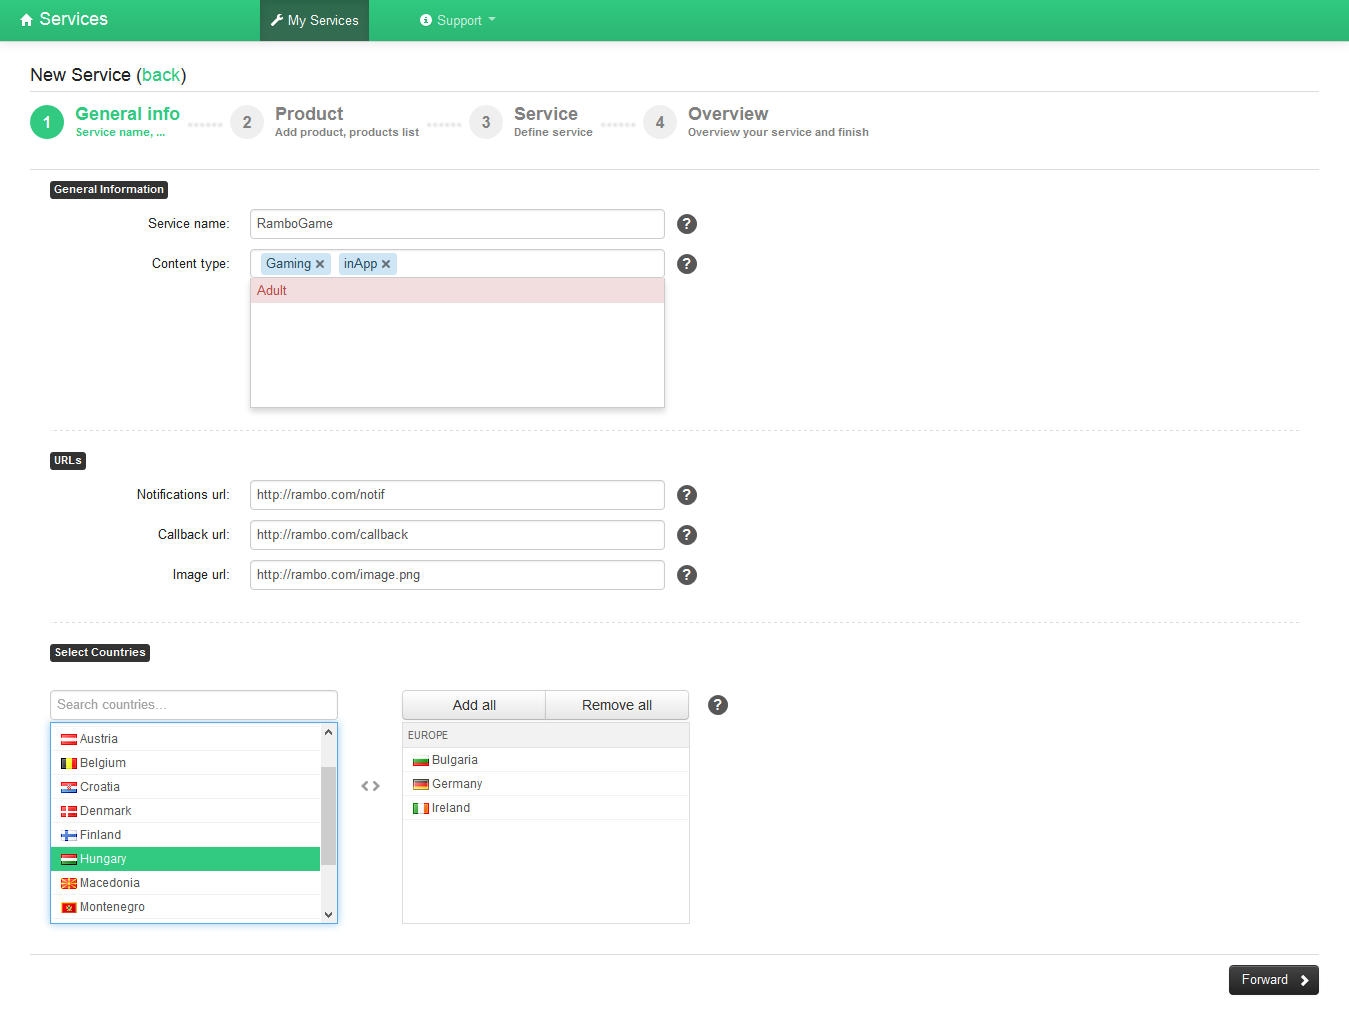
To create your service, you need to open My Services view and click on New Service button. After that you will be presented with 4 step wizard (see image below), which will guide through your service creation process.
STEP 1.
In first step of the wizard (presented on the image above), you need to enter general information about your service:
- Name – symbolic name of the service which will be used for evidention purposes and as a reference in payout statistics, in case of any communication with customers etc.
- Content type – content type tags which mark and describe your service content best. Note, some content types are not allowed to be sold through MoCoPay s0 such will be forbidden in our system.
- Notifications url – default URL where our system will send you asynchronous payment notifications, optional parameter, you can override this value when initializing each payment
- Callback url – default URL where user will be returned after finalizing payment on our payment forms, optional parameter, you can override this value when initializing each payment
- Image url – default URL with your service logo image which will be showed on our payment forms, optional parameter, you can override this value when initializing each payment
- Countries – countries in which you plan to sell your service, at least one has to be selected and you can add any of the offered ones
STEP 2.
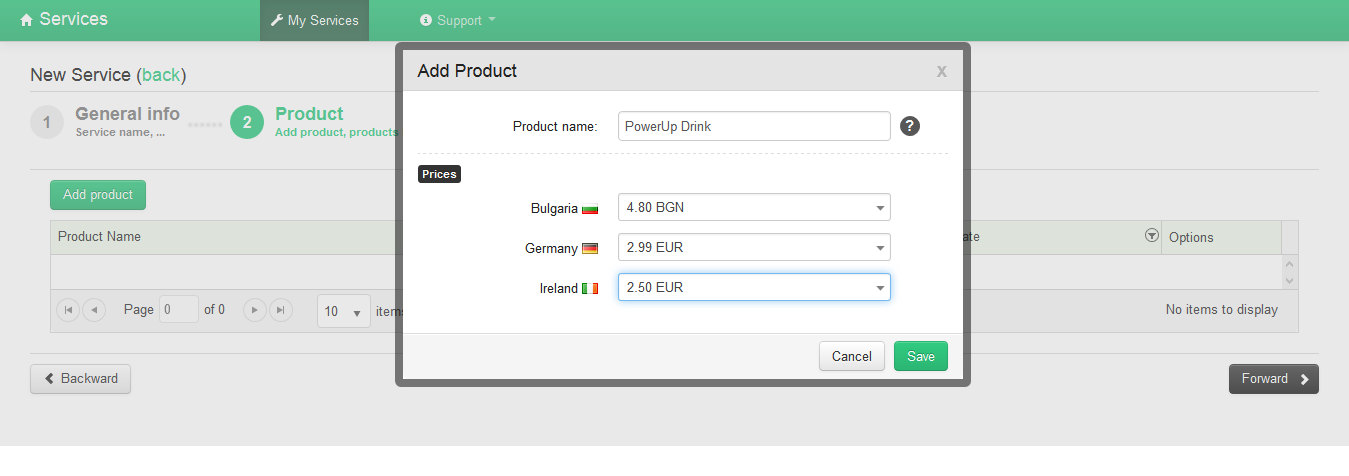
Second step of the wizard (presented on the image above) allows you to create your selling products, which you will actually sell in your service. You should have at least one product, and up as many as you want. For each product you should define following:
- Name – text which will be presented to the end user before purchasing the product
- Prices – define prices in countries in which you decided to sell your service. Prices are shown in local market currencies and you are offered complete selection of prices that MoCoPay can bill. If you are missing some price, contact our support for more information.
STEP 3.
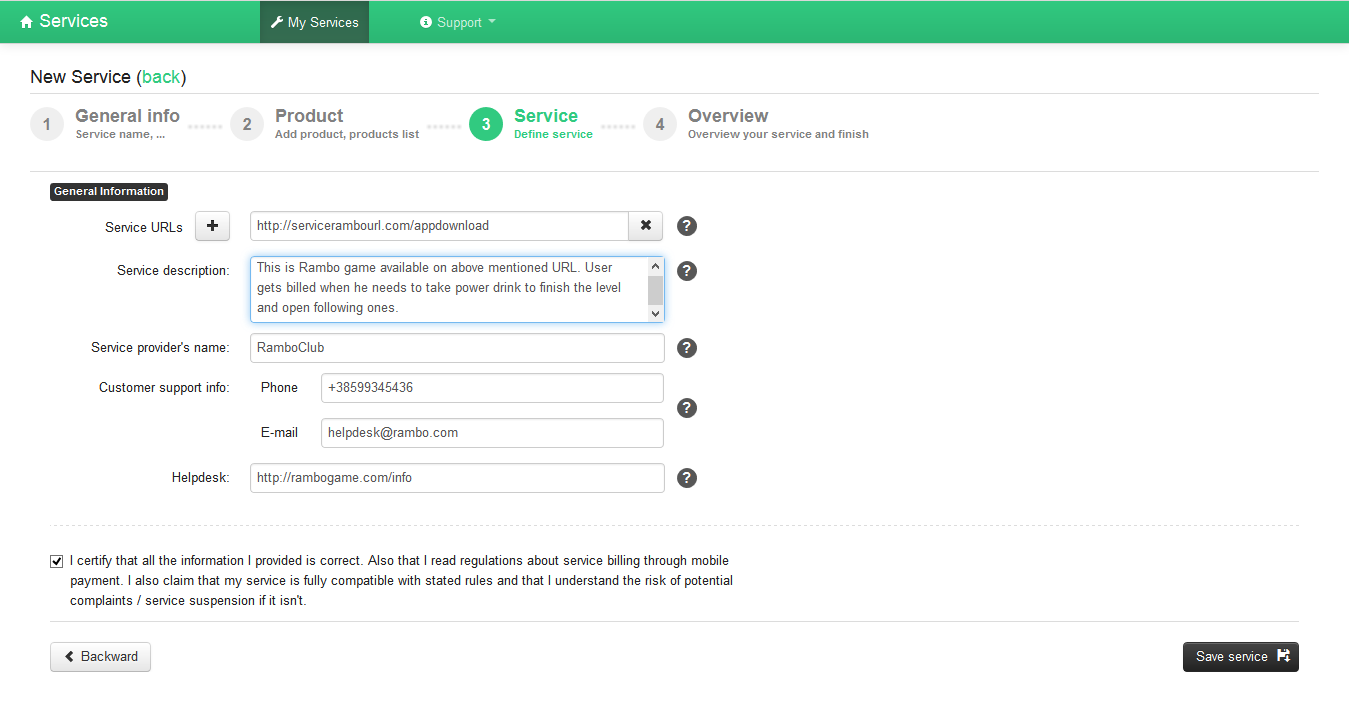
Third step of the wizard allows you to fill in all general information about your service. This information will be used by MoCoPay for any approval and auditing purposes. Also information written here will be communicated to the end users in case of any disputes. Because of that, accuracy of this information is crucial so there is also at the end of this step short EULA which you need to accept to get things finished.
In more details, this step contains following:
- Service URLs – list of URLs on which your service can be found, previewed, downloaded… please add all relevant URLs for your service
- Service description – free form text input field, in it enter information which describes your service concept the best, we shall use this text to figure out how your service works, so be descriptive as much as you can
- Service provider’s name – name of the provider which is selling this service to the users e.g. you can put your company name, or your brand name here
- Customer support info – important informations which we will use for handling escalations from end users regarding the service, both phone and email would be recommended to be entered here
- Helpdesk – URL on which end user can find all useful information about your service e.g. terms and conditions, contact details, service description…
- EULA – checkbox confirmation with which you claim that entered information is correct and that you are aware od MoCoPay terms&conditions and that you fully fulfill all mandatory elements.
STEP 4.
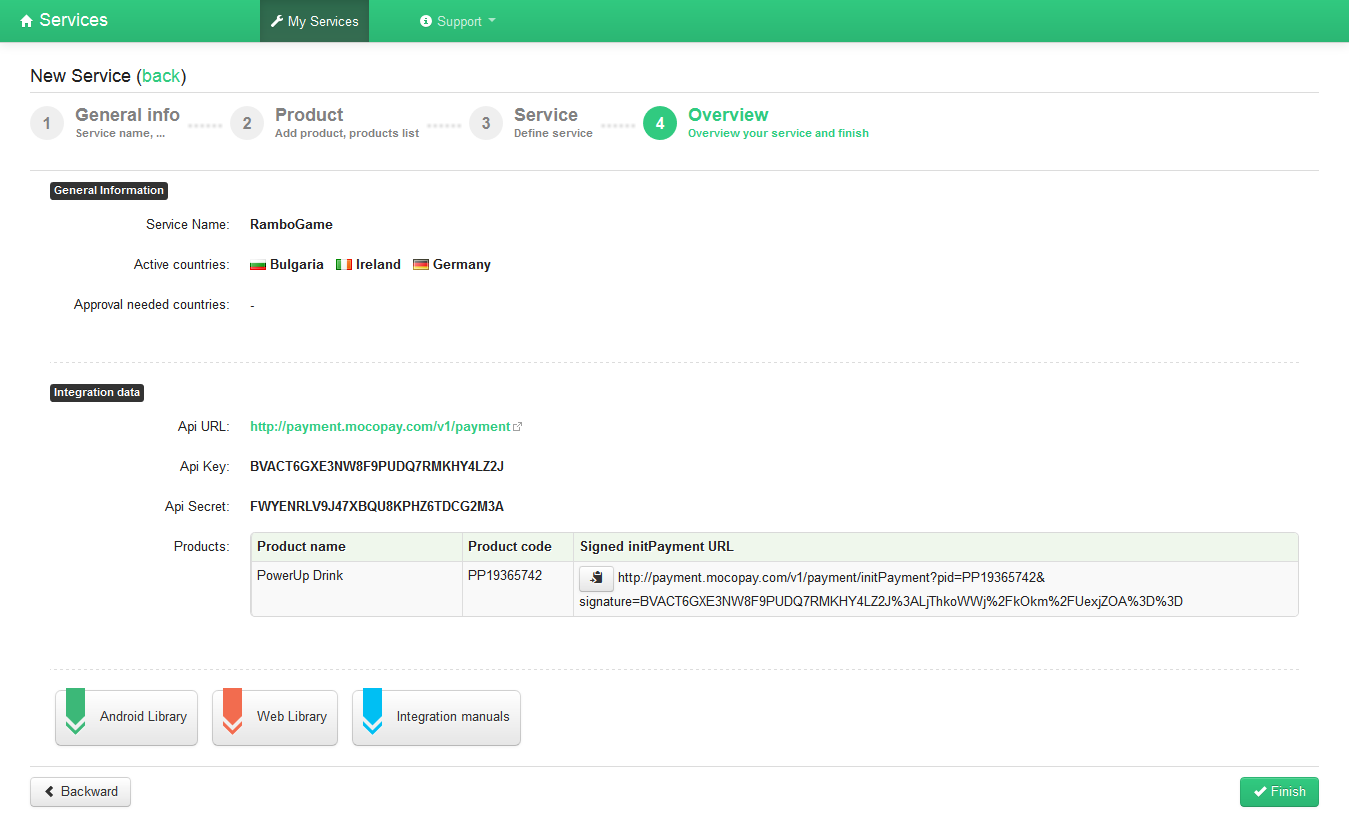
Fourth step of the wizard gives you final information summary for created service and its products.
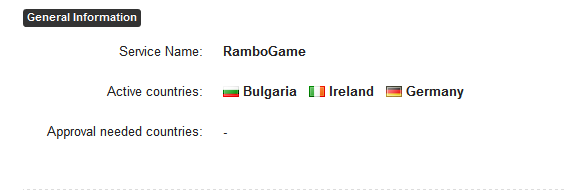
First part of the screen shows you which countries are activated immediately after finalizing your setup (it means that you can start to sell your service in those countries without waiting), and which one are not. In example on image above all three countries are activated immediately after service creation.
Also this view gives you all the data that you need for starting the technical integration with MoCoPay. Concretely:
- Api URL – URL of our payment server to which you should send your payment initiation requests
- Api Key, Api Secret – two values which are used for security purpose in your communication towards us, it is highly recommended that you don’t share and expose values of this parameters to public access.
- Products list – list of products that you plan to sell in your service, each product is given its:
- Product code – which is mandatory parameter in payment initialization towards MoCoPay
- Signed initPayment – example of signed initPayment request and with minimal set of parameters (just product code). This example can and should be used for help in integration process, signature can be copy/pasted and used in WEB SDK or Cross-platform API as correct value in payment initialization that uses just product code or/and referenceId (which is not a subject of security signing when used just in combination with product code).
After finalizing explained 4 step wizard you have all you need to start making some revenues and enjoy…in any problems feel free to contact our support.


